AUVSI USUAS – NCSU Aerial Robotic Club 2012 Resuts

The following details the mission performance of NC State University’s Aerial Robotics Club at the 10th annual AUVSI Student Unmanned Systems competition.

The autopilot successfully executed a fully autonomous take-off before switching over to manual control due to an error in the autopilot’s altitude configuration.  It was later determined to have been operator error caused by improper zeroing of the altitude.  Autonomous control was regained by flying at a higher altitude than originally planned.  The waypoints, search pattern, and emergent target pattern were flown at this fixed altitude.

One special feature added this year was a laser altimeter.  Despite early concerns of a failure, the altimeter performed well through out the mission.

The SRIC message was determined to be:

John Paul Jones, defeated British ship Serapis in the Battle of Flamborough Head on 23 September 1779

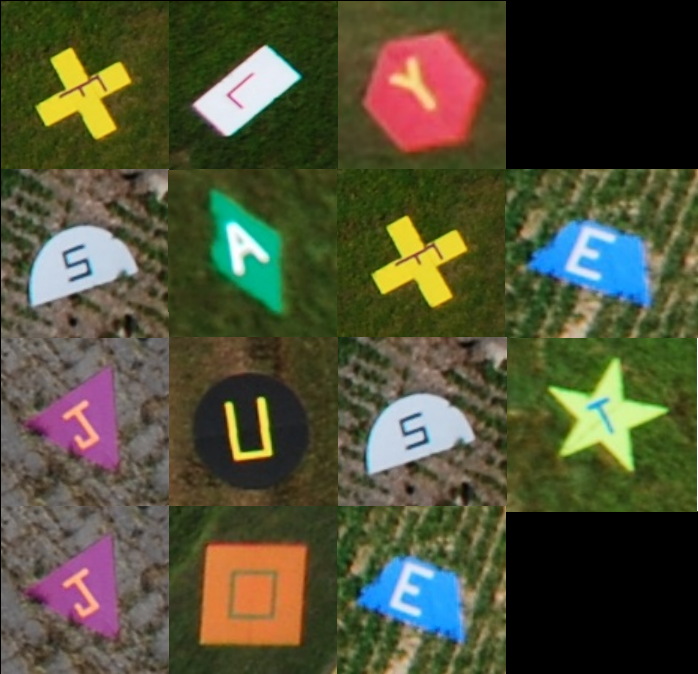
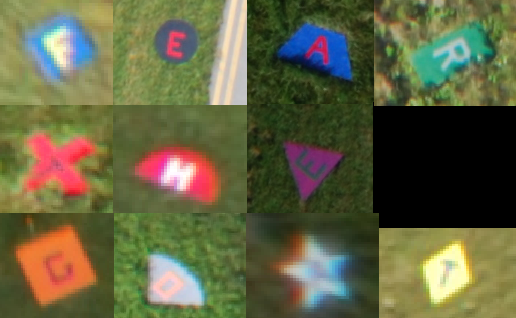
The targets this year spelled out the phrase, “Fear the goat”.  This apparently has something to do with the mascot of the United States Naval Academy “Bill the goat”.

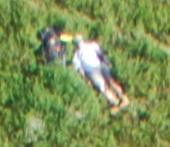
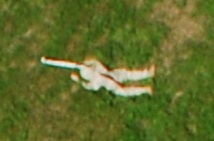
The emergent target this year was a wounded hiker and his backpack.  Most of these details were visible in the images taken with the exception of his wounds.

2012 AUVSI USUAS Results

The 10th annual Undergraduate Student Unmanned Aerial Systems competition hosted by AUVSI’s seafarer chapter concluded last week.  Teams from across the United States, Canada, India, and Turkey converged on Webster naval airfield for several days of autonomous competition.

Final standings

  1. Universite de Sherbrooke
  2. Embry-Riddle (UARE)
  3. California State at Northridge
  4. Delhi Technical University
  5. Cornell University
  6. North Carolina State University
Best Journal – University of Texas at Austin
Best Oral Brief – Kansas State University
Best Mission – Universite de Sherbrooke

 Autopilots

Listed here are some of the autopilots used by various schools.  If you know what autopilots any other schools were using please comment below.

Piccolo

  • North Carolina State University
  • Mississippi University
  • Kansas State University
  • Kansas State University (Pomona)
  • Cornell University
  • New Delhi University

Papparazzi

  • Universite de Sherbrooke
Micropilot
  • Great Mills High School
Custom
  • Utah State (Rotary)

Ardupilot

  • Rutgers University
  • Embry Riddle Prescott

Piccolo Telemetry Visualization

The Piccolo Command Center (PCC) software allows an operator to plan and execute flights using the Piccolo autopilot.  However, it can be difficult to analyze post-flight telemetry.  Additionally, access to the PCC software is limited.

To address this problem I created a matlab function “log2kml.m” to convert Piccolo log files into KML files readable by Google Earth (GE).  This function reads the space delimited log file into Matlab.  It then filters out bad GPS points.  Finally it steps through the data to create a KML polyline.  The line is segmented based on the flight mode to clarify what the autopilot was doing.  The function uses the KML toolbox created by Rafael Fernandes de Oliveira.  It can be found at http://www.mathworks.com/matlabcentral/fileexchange/34694.  This toolbox is put together well and was easy to use.

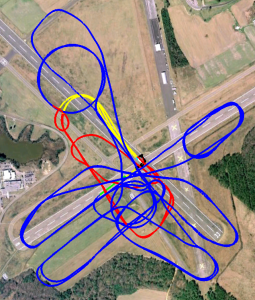
The results shown below make the high performance of the autopilot clear.  Since the points are 3D there is some distortion of the actual ground path.

AUVSI 2011 NCSU Competition Run

AUVSI 2011 NCSU Competition Run

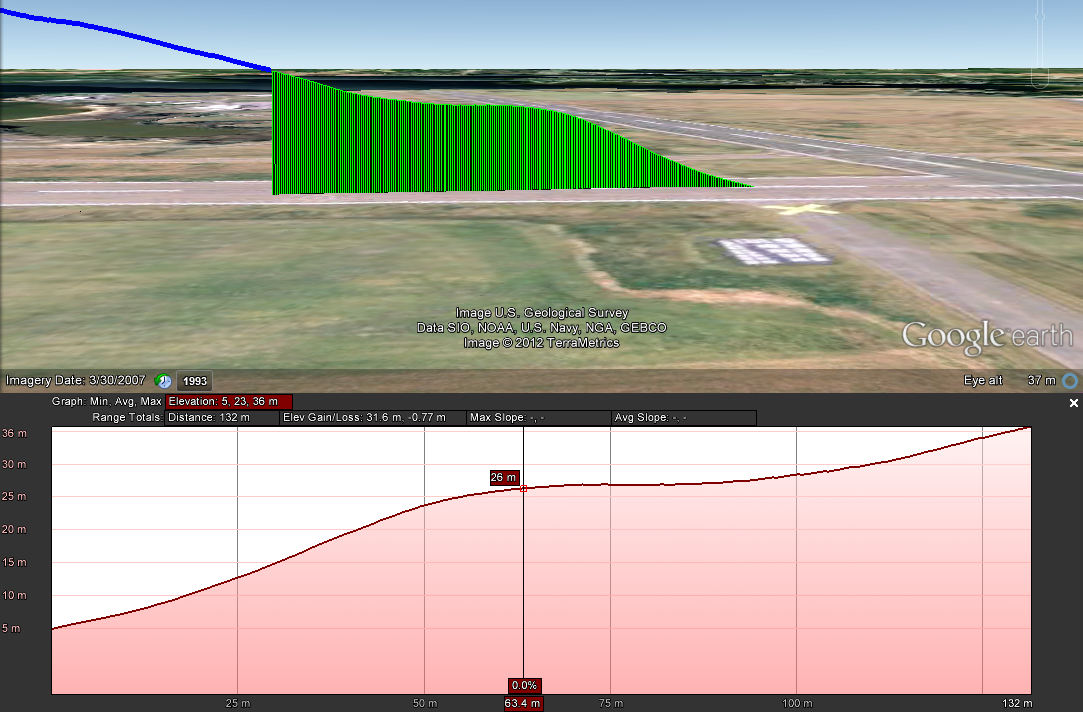
This visualization  allows us to analyze certain maneuvers much more easily.  A point of concern on autonomous take-offs has been a “dip” that occurs as the aircraft switches from prioritizing altitude to prioritizing airspeed.  Using the “Elevation Profile” tool in GE alongside the flight path allows for a clear observation of the performance.

Autonomous Take-off Performance

Autonomous Take-off Performance

It can now clearly be seen that the aircraft does level out, but does not lose altitude.  We can also determine that it levels off at an altitude of 21 meters or 68 feet above ground level.  This new knowledge can now be applied to improving future performance, or at least avoiding flying in to trees at the end of the runway.

For comparison a screenshot from the PCC is shown below.  Since the blue line representing the flight path is so course, the fine motion of the aircraft is only apparent when animated.  The profile view only shows the current position of the aircraft.  Finally, the 3D view isn’t apart of the base software package resulting in the “License Required” text being splashed across the screen.

PCC View

PCC View

AUVSI 2011 SUAS Competition Results

Overall Results

Once the full rankings are released, this list will be updated to include all the teams.  In the meantime, the top five overall teams are listed below.

  1. Utah State University FOSAM
  2. North Carolina State University
  3. Sherbrooke University (Canada)
  4. United States Air Force Academy
  5. Kansas State University
  6. California State University at Northridge

More information and a lot of great photos can be found here at rcgroups.

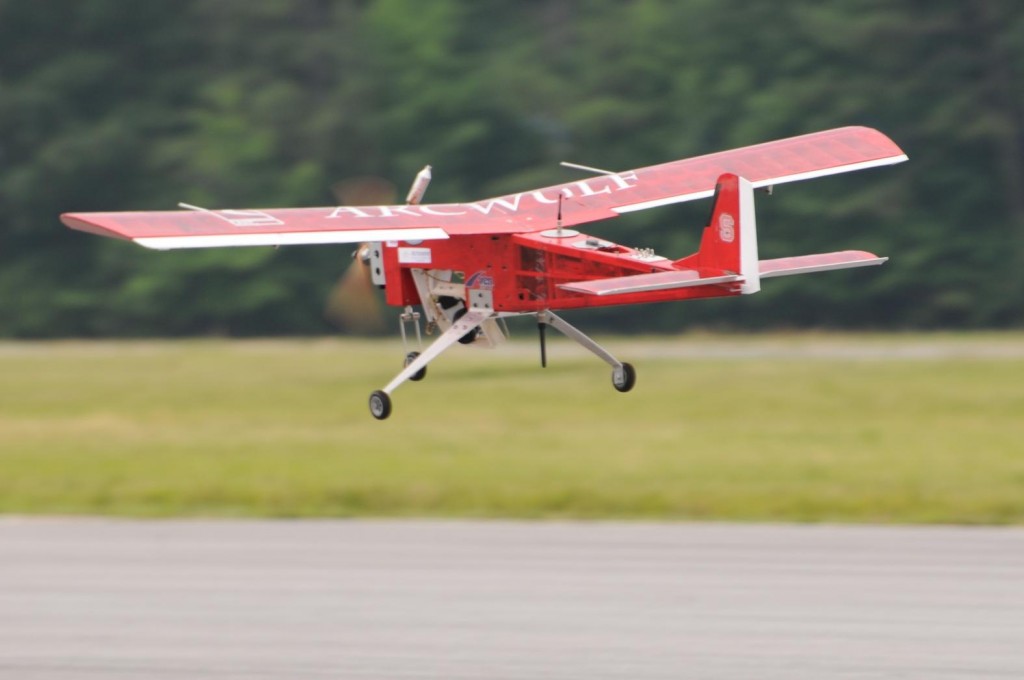
ArcWulf UAV on Autonomous Landing Approach

ArcWulf UAV on Autonomous Landing Approach

Autopilots

The competition offers an excellent opportunity to see what systems other universities are using and to gauge how they performed.

Piccolo

  1. North Carolina State University
  2. United States Air Force Academy
  3. Kansas State University
  4. University of Arizona
  5. Mississippi State University

Paparazzi

  1. Utah State University
  2. Sherbrooke University
  3. M.S. Ramaiah Institute of Technology
  4. Utah States University ROSAM

Ardupilot

  1. Delhi Technical University
  2. Bucknell University
  3. Embry Riddle Aeronautical University
  4. Rutgers University

Micropilot

  1. Florida International University
  2. Great Mills High School

Kestrel

  1. University of California at San Diego

Custom

  1. Hampton Roads Area High School

Simple Necessities

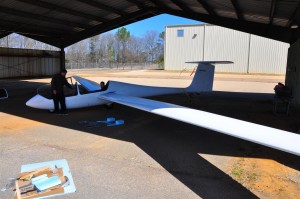
It is sometimes the case that even the most ambitious projects must start off by addressing the most simple of problems.   In this instance a laptop needed to be mounted in the Grobe glider shown below.  The person sitting in front of it also needed to maintain full access to the flight controls and be able to enter and leave the aircraft.

grobe

The Grobe

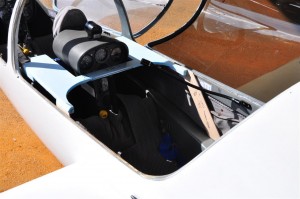
For this part of the project my role was to be a stand-in pilot as the desk’s support frame was fitted.  The completed frame model is shown below.  It is now being fiberglassed.

DSC_2898 (Medium)

Completed desk frame in the Grobe

Writing Piccolo Command Center Plugins – Setting up the environment

Writing plugins for the Piccolo Command Center opens up many possibilities for integrated tools.  Often these tools may need to work with other tools like the PCC’s main map.  By taking advantage of the work done by Cloud Cap Tech you can skip to developing the tool you need instead of spending time writing your own map tool from scratch.  For those interested in writing plugins the first step is to set-up the environment to write and build the plug-ins.

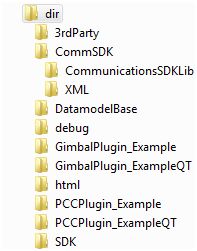
commsDirectory

Each distribution of the Piccolo software comes with a copy of the commSDK and the CloudCapPluginSDK.  These two zip files can be found under <Start><Cloud Cap Piccolo 2.x.x><Tools><Software Development>.  Unzip the CloudCapPluginSDK.zip into your working directory.  Unzip the contents of the commSDK and put them in a folder called “CommSDK”.  Put this folder in working directory.  The final directory structure should look similar to that shown to the right.

The PccPluginExamples is a Visual Studio 2005 file which will contain some examples to get you started.  Now you will want to install Visual Studio 2005 if you have not already done so.  It may be possible to compile plugins in a later version of Visual Studio, but I am not aware of any success stories for that path.  Once you have installed VS 2005 you should be able to open the PccPluginExamples file.  From the “Solution Explorer” click on “PCCPlugin_Example”. Then on the main menu selected <Build><Build PCCPlugin_Example>.  The Plug-in should compile successfully.

If the compiler complains of missing files, or you need to put the commSDK elsewhere you will need to review what paths the compiler is looking under.  These can be found by right-clicking on the line “PCCPlugin_Example” under the “Solution Explorer” and selecting properties.  The include directories can be be found under <Configuration Properties><C/C++><General>.  A similiar list for the linker can be found under <Configuration Properties><Linker>.  The libraries to be included by the linker are listed in under <Configuration Properties><Linker><Input>.  You will probably not need this information if you are using version 2.1.1.c or later.  If you are using an earlier version you may also need some of the information discussed in this thread on the cloud cap forum.

Setting up Qt with Visual Studio integration for use with VC 2005 can be a challenging task because you will need to build the add-in yourself.  Luckily this guide steps you through the process and makes it easy.  This method has been shown to work on Windows XP.  Once you have finished building and installing QT you should be able to compile the Qt example also included in PccPluginExamples.

Alternatively, Cloud Cap has gone through the process of building qt for VC 2005 and has made the result available.  Go to http://www.cloudcaptech.com/download/Custom%20Plugin%20Tools/ and download the zip file.  Included is a read-me file with directions on how to install the software.  You will first need to install QT.  The link provided in the didn’t work for me, but I found the file at http://ftp3.ie.freebsd.org/pub/trolltech/pub/qt/source/qt-win-opensource-4.5.2-mingw.exe .  Then run the executable included in the zip file.  Finally go to http://qt.nokia.com/downloads/visual-studio-add-in and install the Visual Studio Add-in.  Finally, you will want to edit your environment variables.  Make sure that you close any open instances of visual studio before starting this process.

  • Edit environment variable to add:  QTDIR = c:qt4.5.2
  • Edit the PATH environment variable to add:  %QTDIR%bin.  This variable will likely contain other values so remember that to separate your value with a “;”.
  • NCSU Aerial Robotics Club 2010 Results

    Presented here are the results from NCSU ARC’s competition run at the 2010 AUVSI Student Unmanned Aerial Systems.

    sniper

    Here is the picture we took of the emergent target given during flight.

    AUVSI2010-Message

    Every year the targets in the field spell out a message.  This year the message was two part: “Fly safe” and  “Just Joe”.  The second phrase comes from Joe Brannan (The director of the competition) insisting that people just call him Joe instead of Joseph.  The graphic shown above was made using the imagery that we collected at competition with the exception of the “O” target.  The “O” target is provided by Utah State University.

    First PCBs

    I just sent out my first PCBs for fabrication at batchpcb.com.  The first board is simply a Sparkfun breakout board for the WiFly.  As it turns out, it is cheaper to buy  the WiFly from another company and then pay to have a custom breakout board made, than it is to buy the combined assembly from Sparkfun.  However, this method does take more time, and requires more tools, but that is half the fun!

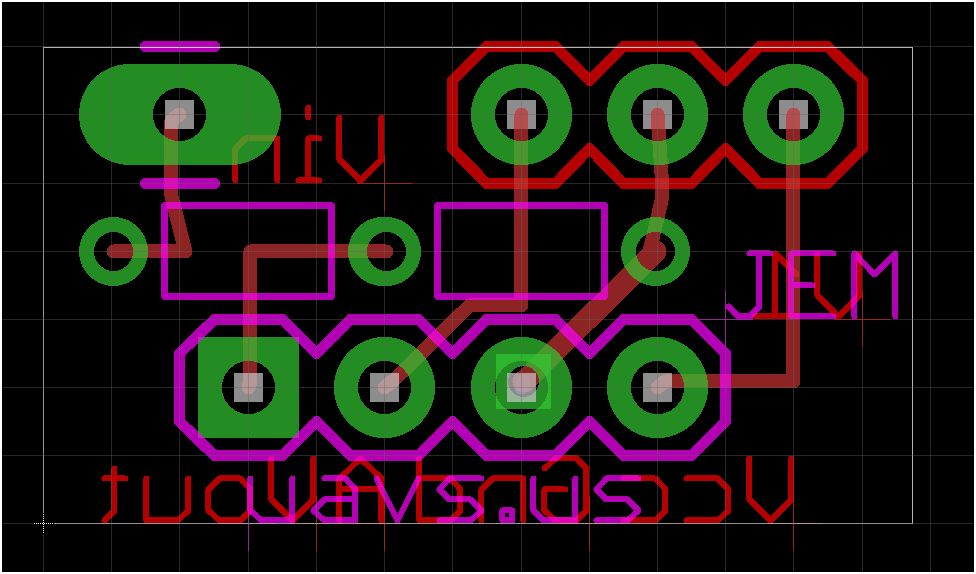
    The second board is more interesting.  The Wattmeter Plug-in I wrote for the Piccolo requires a special sensor board to provide the voltage and current data to the Piccolo.  Originally this was made for a system that already had that component, so I didn’t need to do any work with that part.  Since every  PCB order comes with a $10 handling fee and the WiFly breakout only cost $5, I decided to make an attempt at making my own sensor board.

    VCsensor

    Simply named the VCsensor, the board is all through-hole components, mostly because that is what I have available. The board came out quite compact at less than one square inch which makes it cheaper to have fabricated.  When the boards come in I’ll find out the results of my first experiment in PCB fabrication.

    New Plug-in for Roll Pitch Gimbal

    Besides the Piccolo autopilot Cloud Cap makes another product called the TASE.  This system is built around a pan-tilt (PT) camera that can be mounted on an UAV.  The system can be closely integrated with the Piccolo Command Center allowing the user to quickly redirect the camera.  This system costs as much as a new Piccolo autopilot and as such was disregarded by the Aerial Robotics Club for whom I am writing this plug-in for.

    However, the software to integrate with the gimbal is available at no additional cost to control a PT gimbal.  Thus the plan became to write a plug-in that would make adapt the commands for a PT gimbal to a roll-pitch (RP) gimbal.  This plan of action was pursued for about two months and the software was unavailable at three test flight days.

    Finally,  I came to my senses and realized that I could make a much more simple plug-in that would satisfy all the requirements of the user.  The only feature gained by going through the TASE software was the ability to right-click on the main map and redirect the gimbal to lock to a GPS location.  Having removed this feature I was able to write a preliminary version in a mere two hours.

    RP-Gimbal

    As shown above, the preliminary version successfully implements the two features shown with white buttons.  The stow button commands the gimbal to a position that puts the lens as far from the ground as possible; helpful during rough landings.  The Nadir button points the camera straight down for taking orthographic pictures of the ground.  A text field shown on the bottom half is used only for debugging purposes and will not be included in the final product.

    The Angle, Offset, and Orbit features were not implemented, but will require only a modest time commitment to make work.   The arrow will gives the user a graphical feed-back of the current roll of the gimbal relative to the earth.  The “Auto-stow” feature is also another to-do list item.  This feature will automatically unstow the gimbal when the aircraft is in a “flying” state and keep it stowed for all other portions of the flight (preflight, take-off, and landing).

    This feature is more then adequate for all the competition and testing purposes.  The Nadir feature is allows for imaging the search area.  The Angle and Offset features allow for photographing an off-center target.  The Orbit feature allows simple targeting of the “Pop-up” target.  It can be noted that these features still exceed the requirements, as the last three features all do essentially the same thing (off-axis pointing).  However, all will be included because their inclusion is not time-consuming and will reduce the operator’s workload greatly.

    In this discussion I have neglected to comment on the Adapter and GPS buttons.  Although the project has gone in a new direction it would be interesting to see advanced features included.  In time these will likely be removed as vestigial code.
    Upcoming Project: Variometer

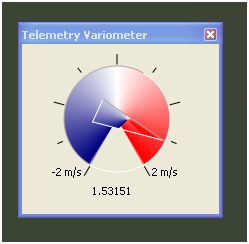
    I’ve started working on my next project, a telemetry based variometer.  A variometer is commonly used by glider pilots to monitor the rate of climb of the aircraft.  The Piccolo autopilot provides the operator with altitude information, but does not exploit this to data to the full extent.  The plug-in that I am working on will include compensation for total energy and for the intrinsic sink rate of the aircraft (if sufficient information is provided by the operator).  This will make it easier for an operator to determine if the plane is in rising air during thermaling maneuvers.  It will also eliminate the need for a separate variometer system to be installed in the aircraft.

    VarioProto

    Above is the latest screen-cap from the variometer prototype.  The device is nominally functional, but it far from finished.  The to-do list includes user configuration options, audio indications, and ascetics.  Adding the audio feedback will be a rather interesting feature, although it may be dropped from the initial release of this plug-in.

    Return top